

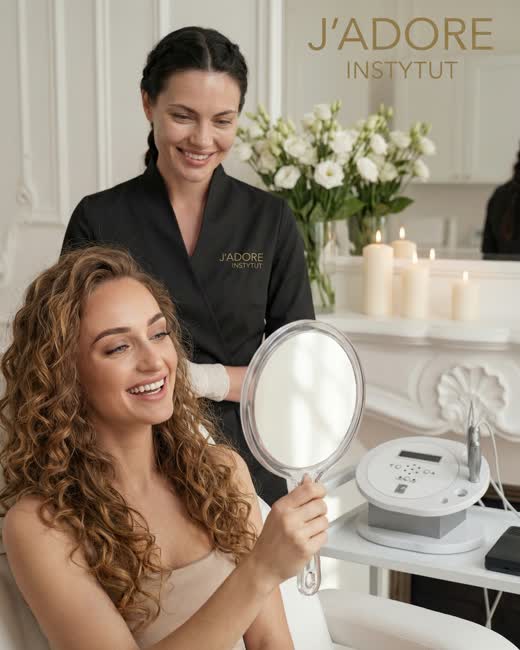
Two weeks before, organise your health and skincare
Start with a list of medications, supplements, allergies, skin conditions, previous pigmentations and any treatments performed in the forehead and eye area. Do not stop taking prescribed medications on your own. Send the list to your linergist. If anything might affect clotting, healing or immunity, consult your doctor on how to proceed. A true record is more important than a "clean slate".
- Do not plan aggressive exfoliation, tanning or any treatment that leaves the skin reactive.
- Do not test a new retinoid, acid, essential oil or eyebrow growth product.
- Take a photo of your brows without makeup in daylight; it will be useful for discussing asymmetry and your expectations.
- If you have old pigment, send a photo after removing your makeup as well. The new colour should not always cover the previous one.
- Note how you usually draw your brows, but do not treat your daily drawing as a design to be replicated without reflection.
Two days before, do not improve anything
At this stage, restraint helps the most. Do not pluck hairs, tint your brows or attempt home lamination. The natural growth line provides information to the linergist: it shows hair direction, density and areas where the design should support the brows rather than fight them. If your skin is stinging, peeling or if you have a cold sore, rash or infection, report this before arriving.
Prepare photos of effects you like and those you do not. A good conversation does not end with the word "natural". For one person, natural means powdery softness; for another, visible hair strokes and a very light tail. Defining boundaries gives more than choosing a photo from the internet.
On the day of your visit, allow time for the design
Eat a normal meal, bring your list of medications and arrive without rushing. You do not need to cleanse your brows heavily or disinfect your skin at home. The design should be viewed at rest, during conversation and with various facial expressions. Ask to see the shape up close and from a few steps away, as the face is perceived as a whole.
- Do not accept the design just because the next client is waiting.
- Ask which technique suits your skin type and why.
- Establish what is the first stage and what is only assessed after healing.
- Ask for aftercare instructions in a form you can return to at home.
- Leave some quiet time in your calendar after the treatment; fresh pigment is not the final colour.
What actually happens to the skin during the treatment
Permanent eyebrow makeup involves introducing pigment into the dermis — the layer lying beneath the epidermis. This is deeper than a regular cosmetic tattoo reaches, yet shallower than a classic artistic tattoo. This depth is not accidental: the goal is for the pigment to be visible and durable, while allowing the skin to naturally remove particles over time. This means the PMU effect gradually fades and can be refreshed instead of lasting a lifetime.
The needle introduces pigment point by point, in a rhythmic motion, creating hundreds of micro-injuries. This is not damage in the colloquial sense — it is a controlled stimulus to which the skin reacts exactly as it was designed: it triggers a repair cascade. And it is this repair cascade that you see over the following days — not a "capricious" reaction of your skin.
The first hours and day one: intensity you did not expect
Immediately after the treatment, the brows look noticeably darker and more defined than the goal you discussed with the specialist. This is not a mistake — it is physiology. The skin is slightly swollen, blood vessels are dilated, and the pigment is still on the surface before it is "absorbed" deeper. The colour you see right after the treatment is raw pigment, before the filters that the skin will apply in the following days.
There may be slight redness around the brows, a feeling of tightness and sensitivity to touch — this is a standard inflammatory reaction. The skin has just triggered the first stage of healing: an influx of immune cells that examine the new substance. Some of the pigment that did not penetrate deep enough is trapped in the serum, which will start to form a delicate layer on the surface.
Days 2–4: a scab appears and this is good news
Between the second and fourth day, a thin scab begins to form on the surface of the brows — delicate and darker than the surrounding skin. For many people, the brows look like they were drawn with too thick a line at this stage, a bit "dried out". This is the stage that often causes the most concern — because visually, it is the least similar to the final effect.
The scab is the skin's natural protection: underneath, the actual repair work is taking place. Fibroblasts produce new collagen fibres, epidermal cells migrate and regenerate the surface, and immune cells (macrophages) surround the pigment particles, removing some of them. This last process — pigment phagocytosis — is one of the reasons why PMU colour fades naturally over time.
Aftercare that actually matters
The healing stage is the only moment when you can actively influence the quality of the final result. Not through a special serum or an expensive cream — but by avoiding a few specific things and following the simple aftercare recommended by your specialist.
- Water directly on the brows in the first few days — it may wash out pigment that has not yet had time to anchor.
- Sauna, swimming pool, solarium for a minimum of two weeks — heat, steam and chlorine accelerate exfoliation and can draw out pigment.
- Makeup on the brow area for the first few weeks — risk of introducing bacteria into the healing skin.
- Picking the scab — even by accident when washing your face — can cause colour loss in the final result.
- Creamy retinols and acids on the brow area — they accelerate epidermal exfoliation, which shortens the durability of the effect.
Every PMU specialist has their own proven aftercare indications — they may differ in detail depending on the technique and pigments used. These individual recommendations take priority over general rules from articles. If you have any doubts — ask the person who performed your treatment.
When healing looks different — and what can be a signal to get in touch
Most women go through healing after eyebrow PMU without any complications. The stages described above — intensity after the treatment, the scab, fading, return of colour — are the standard, not the exception. However, there are signals worth observing and for which you should contact your specialist or a doctor.
- Redness and swelling intensifying after the third day instead of gradually subsiding — the standard inflammatory response peaks on the first day.
- A burning sensation or throbbing pain — minor sensitivity is normal, intensifying pain is not.
- Discharge with a yellowish or greenish tint — lymph is transparent or slightly straw-coloured; a change in colour may indicate an infection.
- A rash or blisters outside the brow area — this may indicate an allergic reaction to the pigment or anaesthesia.
What influences the durability of the effect — and when it is worth returning for a refresh
Eyebrow PMU is not lifelong — and that is its advantage, not a disadvantage. The pigment gradually fades, which allows you to adjust the shape and intensity to your changing style, face and preferences. For most women, the effect stays in good form for one to two years, after which it is worth refreshing.
- Skin type — oily and combination skin produces sebum faster, which can push pigment out of the dermis; the effect may fade faster.
- Sun exposure — UV radiation degrades the pigment. People who spend a lot of time in the sun without protection may require a refresh sooner.
- Use of acids and retinoids — these accelerate epidermal renewal, which shortens the time until visible fading.
- Hormonal balance and medication — certain medications and hormonal changes can affect the rate of epidermal turnover and, consequently, the longevity of the pigment.
- Treatment technique and application depth — these are selected for your specific skin type by an experienced specialist.
How to prepare your own criteria before the consultation
Before booking, write down in one sentence what you want to change and how you will know that the result is sufficient for you. In the "preparation" topic, it is easy to adopt advertising language and start evaluating names instead of your own problem. Therefore, add three boundaries: what you do not want, how much time you can allocate for regeneration, and what previous experience influences your current decision. Such a note organises the consultation and allows you to see if the specialist's answer addresses your goal.
When deciding on "Permanent Makeup brows: preparation starts earlier than the day of pigmentation", write down the answers literally: the name of the product or technique, the person performing it, the stage plan, the expected reaction, limitations, and the control moment. If the salon uses general terms, ask for them to be translated into observable facts. A "natural result" can mean something different for everyone; "short regeneration" also requires clarification. A good consultation reduces the number of unknowns, but it does not pretend that biology can be given orders.
When comparing places for the "preparation" topic, separate the safety standard from the comfort-building extras. A nice waiting room, a cosmetic sample, or an elaborate ritual may improve the experience, but they will not replace qualifications, hygiene, documentation, and aftercare. On the other hand, the medical aesthetics of the interior alone is not proof of competence. Ask about the procedure and how the team behaves when the course is not textbook.
Re-evaluate your decision after gathering all the data
When deciding on "Permanent Makeup brows: preparation starts earlier than the day of pigmentation", you do not have to book an appointment the moment the consultation ends. Check the recommendations, read the consent form, and see if the scope of responsibility is clear. If, after the conversation, you still cannot say what problem the procedure is supposed to solve, what its limitation is, and who you contact after the treatment, you need answers before starting, not after the fact.
The most useful conclusion from the "preparation" topic is simple: a good decision remains sensible even without the promise of a quick finale. It takes into account the initial state, the real limits of the method, and the possibility of changing the plan. It is precisely this margin that distinguishes an informed qualification from fitting a client into a free slot in the calendar.


