

Two weeks before, gather the history of every pigmentation
Record the dates of treatments and touch-ups, the names of the clinics, the techniques used, and healing reactions. Ask the previous clinic for the pigment name and batch number if the documentation is available. Add photos of the fresh effect, the healed result, and the subsequent shade change. A lack of full history does not exclude you from a consultation, but it reduces the certainty of the prognosis.
Define your goal: full removal, correction of a fragment, or lightening before a new design. Without this, it is impossible to assess when the process is complete.
Do not prepare your skin with acids, tanning or home removers
Your skin should be calm and free from recent damage. Do not apply preparations of unknown origin, do not puncture the area, and do not try to mechanically scrub the pigment. Sunburn, active infection, cold sores, a wound or increased inflammation are reasons to reschedule.
- Do not tan the area.
- Do not perform fresh pigmentation for "colour correction".
- Do not test acids or bleaching agents.
- Disclose any tendency towards keloids and discolouration.
- Do not stop taking medications affecting blood clotting or photosensitivity on your own.
On the day of the consultation, arrive without camouflage make-up
The specialist needs to see the true shade, border and skin texture. Bring glasses or contact lenses if the area is near the eye, as well as a list of your medications. Ask about a patch test, possible colour changes after the first session, aftercare, and contact in case of blisters, increased pain or unusual healing.
Do not plan new PMU until your skin has finished regenerating and the colour has stabilised after the final removal stage. A design created too early may be based on an image that is still changing.
PMU is not a body tattoo — but it is still difficult to remove
At first glance, PMU and body tattoos are the same idea: a needle introduces pigment under the skin. In practice, the differences are significant and directly affect how difficult a given pigment is to remove. Body tattoos are performed deeper — the needle reaches the deeper layers of the dermis. Brow PMU is applied closer to the surface, which in theory should make removal easier. It often does — but only in theory.
The problem lies in the composition of the pigments themselves. Dyes used for PMU are mixtures of organic and inorganic pigments — and this mixing makes the difference. Organic pigments react to the laser differently than inorganic ones. Some of them absorb laser energy and fragment. Others — especially inorganic components like metal oxides — can paradoxically darken after exposure before they start to fade. This phenomenon surprises many patients after the first session, and it is well known to specialists.
Then there is the issue of the application technique. Brow PMU can be performed with microblading (manual incisions with a blade) or a rotary machine. These two methods result in different puncture depths and different pigment density in the tissue. Pigment spread in a thicker layer by a machine requires more sessions than the thin lines of microblading — and conversely, microblading with thicker strokes can be surprisingly resistant. Without knowing the technique used for the PMU, it is difficult to estimate the number of sessions in advance.
How a Q-switch laser works — and why it is not magic
The laser used for PMU removal — most often a Q-switch Nd:YAG or its picosecond variant — works on a principle that is worth understanding, as it explains almost everything in the removal process. The laser pulse lasts a fraction of a second and delivers energy so violently that the pigment does not have time to conduct heat to the surroundings. This leads to photoacoustic fragmentation of the molecules — the pigment fragments into much smaller pieces.
- Step 1 — Fragmentation. The laser pulse hits the pigment molecules and breaks them into nano-fragments — too small to be visible as colour.
- Step 2 — Absorption by macrophages. The fragments are recognised by the immune system as a "foreign body". Macrophages — immune cells — absorb them and transport them to the lymphatic system.
- Step 3 — Elimination. Pigment nano-fragments are eliminated by the lymphatic system. This stage takes weeks — which is why the effect of a session is fully visible only after 6–10 weeks, not after a few days.
- Step 4 — Next session. Once the skin has healed and finished elimination, you can target the next layer or pigment residue. Doing it sooner risks complications without a proportional effect.
What you can do to speed up the effect
Since the key to pigment removal is the immune and lymphatic system, it is logical that everything supporting their work translates into a better effect between sessions. These are not groundbreaking discoveries — they are a well-known routine that should be treated as an active element of therapy, not a nice option.
- Hydration. The lymphatic system needs an appropriate level of hydration to function efficiently. Drinking water in the days after a session and throughout the period between them effectively supports the transport and elimination of pigment fragments.
- Physical activity. Moderate movement after the skin has healed (usually from the 2nd–3rd day after the session) speeds up lymph circulation. This is one of the simplest and most underestimated factors accelerating the effect.
- Avoiding the sun and SPF. UV radiation weakens skin regeneration after the treatment and can lead to discolouration. SPF on the treated area is an absolute rule between sessions.
- Not smoking. Nicotine restricts microcirculation and slows down regeneration — which directly affects how quickly the skin heals and how efficiently macrophages transport the pigment.
- Hygiene of the treated area. Following aftercare instructions (occlusion, no scratching, no cosmetics with acids on the treated area) prevents complications that would extend the time until the next session.
Step one: qualification consultation, not a laser session
One of the biggest mistakes in PMU removal is skipping the consultation and booking a treatment immediately. A good qualification consultation is the moment when the entire plan makes sense. The specialist will assess the colour and depth of the pigment, the PMU history (how many layers, how old, what technique), skin phototype, and any contraindications — and based on this, will tell you how many sessions are realistically expected and at what intervals.
This is also the moment for honest questions. Does the pigment contain ingredients that might darken initially? Does the skin in this area have scarring from previous PMU sessions? Does the planned new PMU require full removal of the old one, or is significant lightening enough? The answers to these questions directly affect the number of sessions and the cost of the entire process — it is worth hearing them before the plan starts, not in the middle of it.
Brow PMU removal is a process — not a single treatment. A good understanding of the mechanism makes each of the 4–8 sessions make sense, and expectations are synchronised with what is physiologically possible. And this, paradoxically, makes the whole process easier than you think — even if it takes a year or longer.

When PMU stops being an asset
Permanent make-up does its job as long as it looks natural. People decide on the treatment for various reasons — medical (filling in brows after hair loss, camouflaging scars after accidents, correcting asymmetry after surgery), sports (swimmers, cyclists — minimum "maintenance" on the go), or simply practical. But pigment dyes change over time, the skin changes, and what looked good a year after the treatment may give a completely different impression three years later.
- Colour change. Black pigment can turn bluish or green; brown — into a greyish-violet. Skin is not paper — the dye reacts with the tissue and UV differently than on a sample.
- Blurred contours. The pigment "migrates" deep into the skin and outwards. A clear line becomes thicker and less precise after years.
- Excessive saturation. What looked subtle right after the treatment can become increasingly darker after a year of fading and touch-ups.
- Change of preference. The brow shape that was fashionable in a given year may not look the way you want now. Or you simply prefer to have a choice.
Zero downtime — how it works in practice
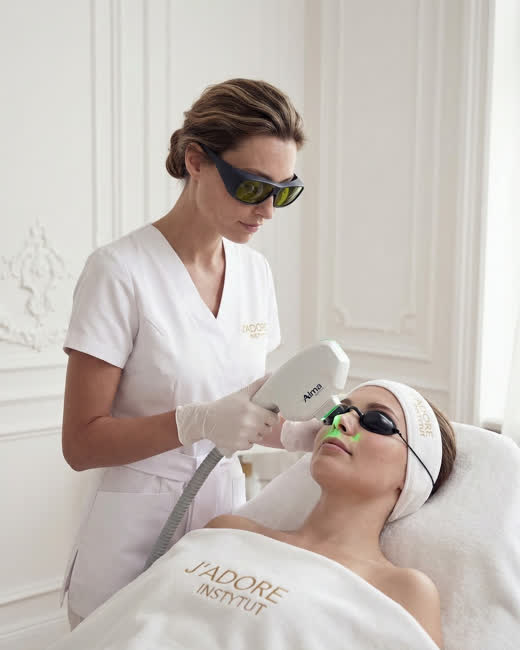
Each session takes a few minutes per area. You will feel a short, intense pulse — similar to the snap of a rubber band. Local cooling makes the treatment tolerable with no anaesthesia, though we can apply a numbing cream for more sensitive skin. Immediately after the session, the area will be red and potentially slightly swollen — this is an inflammatory response that subsides within 24 hours.
- 01
Consultation
We assess the pigment, colour and depth. We determine the number of sessions and your goal. We may perform a test on a small area if high-risk pigments are involved.
- 02
Laser session
A few minutes per area. We use local cooling. Immediately after, you may notice redness, which subsides within 24 hours.
- 03
Regeneration between sessions
Your skin needs time to remove the broken-down pigment via the lymphatic system. Breaks between sessions last several weeks — this is not an extra cost, but a biological necessity.
- 04
Assessing the results
After each session, you can see how much the pigment has faded. The number of sessions depends on the dye and your goal — we assess progress as we go, not in advance.
How many sessions — and why no honest professional will give you a number upfront
This is a question everyone asks. The honest answer is: it depends on the pigment and your goal. Black PMU pigment reacts to a laser differently than brown, and pigment applied two years ago reacts differently than one applied ten years ago. Each colour absorbs different wavelengths — that is why we select the device and parameters per person, not according to a chart.
Many people see a clear improvement after just the first or second session — the pigment fades and the outline loses its sharpness. Full removal to a state where nothing is visible requires several visits spread over time for most people. Selective correction (lightening or removing a smudged area) may require fewer. During the first consultation, we can provide a realistic range — but a "guaranteed" number does not exist, as tissue does not react like a clock.
How to evaluate a plan before making a decision
When discussing "preparation", write down your goal, the starting state and the point at which a different method is needed. Ask for the name of the device or product, the practitioner, contraindications, expected reaction and the follow-up point. Translate general terms into observable facts: what is supposed to change, when, and what this procedure will not change.
In the "PMU Removal: prepare your pigment history, not just your skin" plan, the ability to stop or change direction is important. A package, a trend and a positive review do not replace qualifications. If you cannot explain the goal in your own words after the conversation, return for the missing data before starting, not after the first unwanted reaction.
After the "PMU Removal: prepare your pigment history, not just your skin" treatment, compare your state under similar conditions and also record your comfort, pain, swelling and the time it took to return to your daily routine. A photo shows the surface, but it does not describe function or how you feel. A good assessment combines both types of information.


